This document describes how to add rollover to parts in Builder
Rollovers are assigned to the components that have been added into the sub-component area of the Builder. After adding the rollover to the component, every time when mouse moves over the Part No, the rollover image will be displayed in the main image area. Also, rollovers can also be assigned by providing Image Map data. Once image map is assigned, every time when mouse moves over certain part of the image, the main image is replaced with the rollover image.
In order to add rollover to the component, proceed with the following steps:
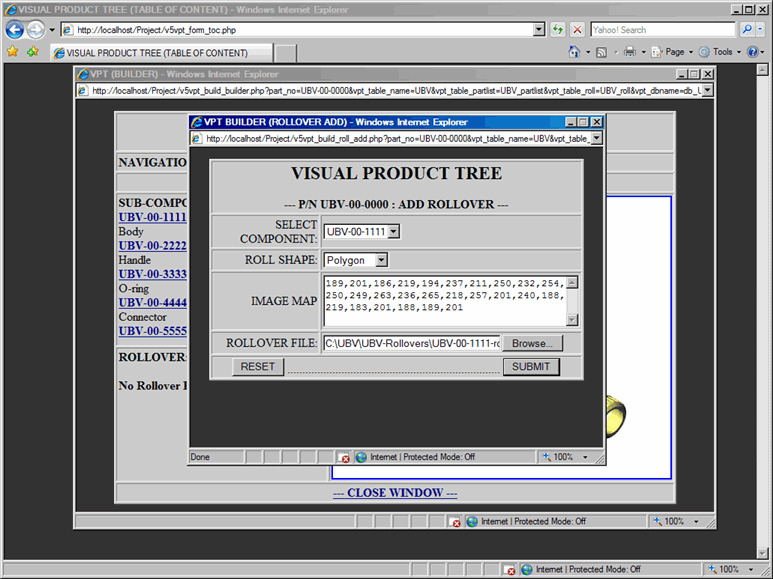
- In the Builder window, from the Rollover area, click on Add link; which will display Add Rollover dialog box, as shown in Figure 1.
- From Select Component drop-down list, select a component to apply rollover.
- From the Shape drop-down list, select the shape of rollover.
- In Image Map text box, add Image Map data for the rollover.
- In Rollover File, provide a rollover image.
- Submit the form to process your request to add rollover.
Note: Multiple rollovers can be added for the same component; However, each rollover can be
identified by its unique Rollover ID number in the Rollover Area.
Builder - Rollover Add Form

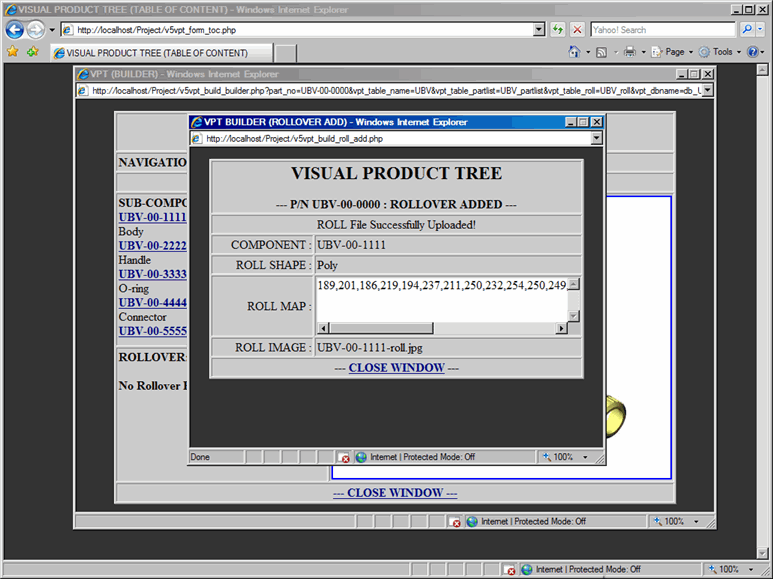
Once the Add Rollover Form is submitted, confirmation window will be displayed with the following information, refer to Figure 2.
- Rollover File uploaded successfully or not, if rollover image was submitted
- Part No of the component to which rollover was added
- The shape of the rollover, if shape was selected
- Image Map data of the rollover, if data were provided
- Rollover file name, if rollover image was submitted
- Submit the form to process your request to add rollover.
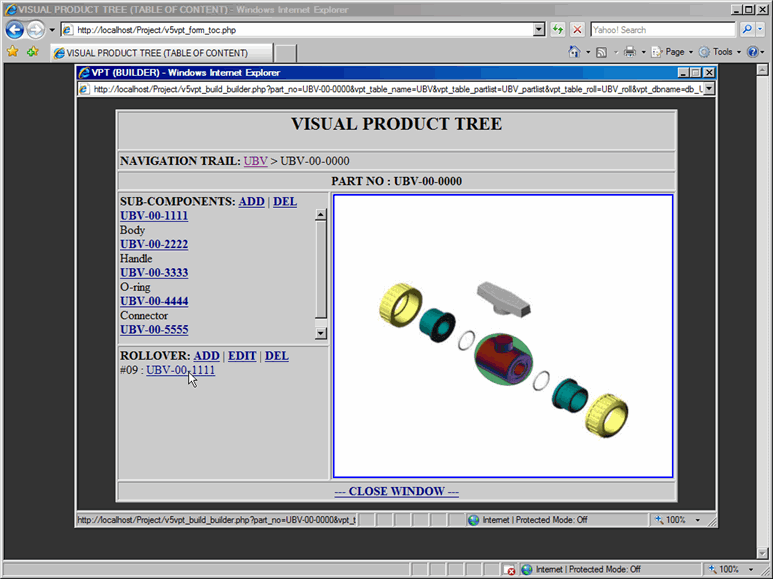
Click on the Close Window link and rollover will be added to the list as shown in Figure 3.
Builder - Rollover Add Confirmation

Builder - Rollover Added
