This document describes introduction to Builder
Once the new Visual Product Tree is added to the Table Of Content (TOC) and all the parts are added to the Parts List (Record Administration); Builder is the second process in building of the Visual Product Tree. This is where you actually build a drill-down structure of the product; starting from top level assembly to sub-assemblies to components.
From the TOC, click on Builder link, which will display Builder window. By default, top level assembly is already shown in the Builder when Visual Product Tree was created in the TOC.
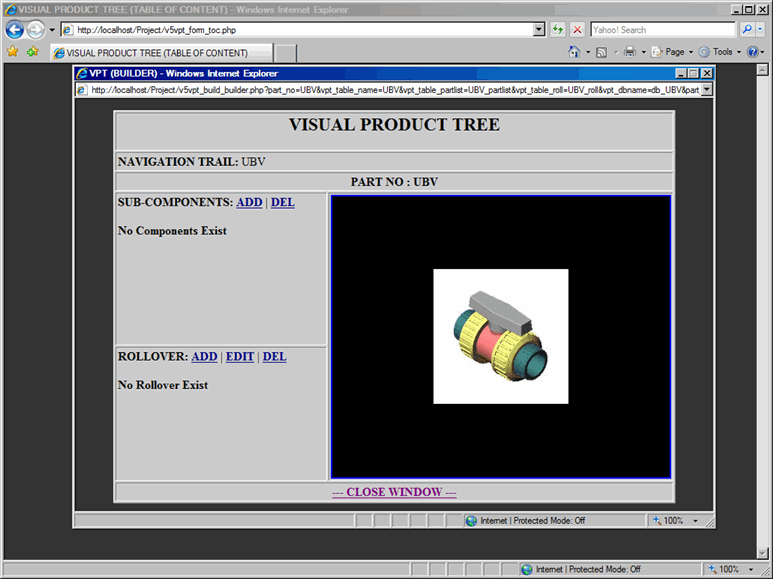
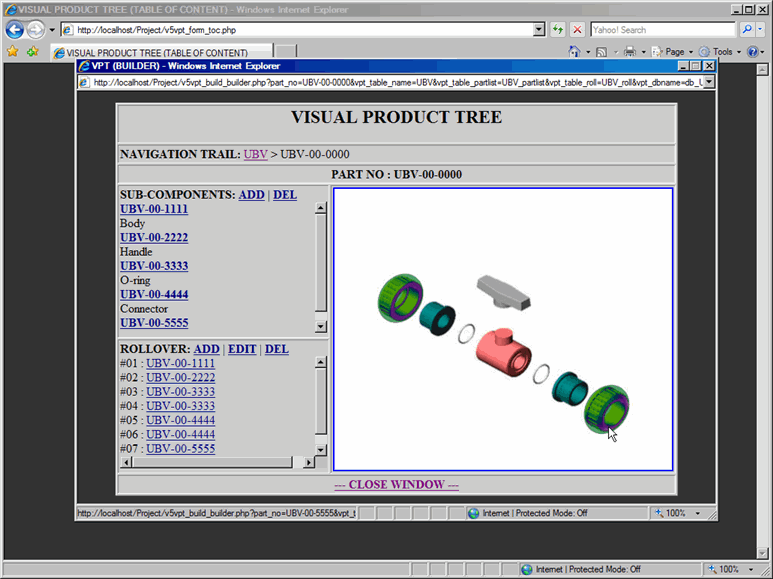
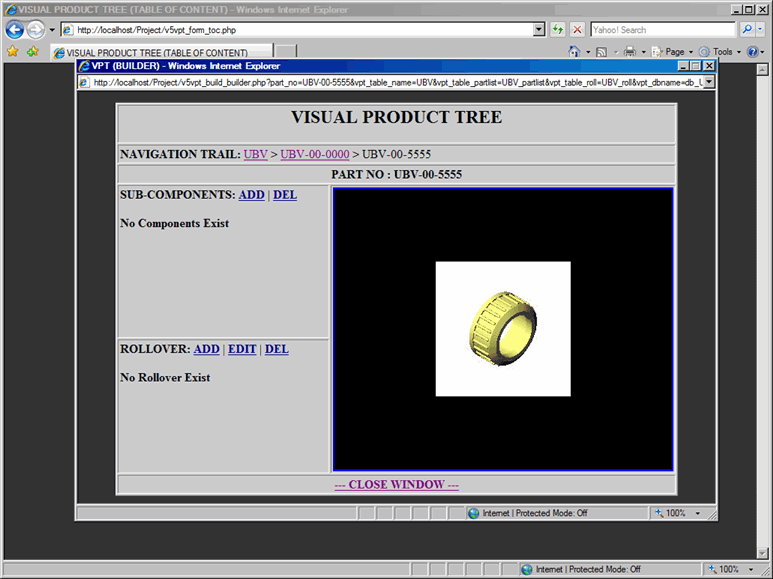
Builder window has six major aspects as described below, refer to Figure 1, Figure 2 and Figure 3:
- Navigation Trail: As you create the drill-down structure of the Visual Product Tree from top level assembly to the bottom level of components; Navigation trail will be created for each level. Navigation trail is an easy way to move (or jump) backward to any specific level in the assembly.
- Part No: As you navigate from top level assembly to the bottom level of components; Part No will change accordingly.
- Sub-components Area:
- Listing of all the components that belongs to the specified assembly or sub-assembly
- Part No of the listed components as a link, clicking on the Part No will direct you to that specific sub-assembly (or component), in the preceding window.
- If sub-components have attachments such as PDF documentation or 3D Model, links will be displayed next to the Part No
- Part Description of the listed components
- Add components into the specified assembly or sub-assembly
- Delete components from the specified assembly or sub-assembly
- Listing of all the components that belongs to the specified assembly or sub-assembly
- Rollover Area:
- Listing of all the rollover that belongs to sub-components in the assembly or sub-assembly
- Unique Rollover ID for each rollover, since single component can have multiple rollovers
- Add rollover for the sub-components of the specified assembly or sub-assembly
- Edit rollover for the sub-components of the specified assembly or sub-assembly
- Delete rollover for the sub-components of the specified assembly or sub-assembly
- Interactive Image Area:
- Part Image: Visual presentation of the Part
- Rollover Image Map:
- Part image can be interactive with the Rollover Image Map
- As you move mouse over sub-assembly (or component); rollover image will be displayed, if it has an Image Map
- Clicking on the Image Map area will direct you to that specific sub-assembly (or component), in the preceding window.
- Close Window Link: Use this link to close the browser window. Do not close the window by clicking on 'X' of the window.
Builder Introduction 1

Builder Introduction 2

Builder Introduction 3
