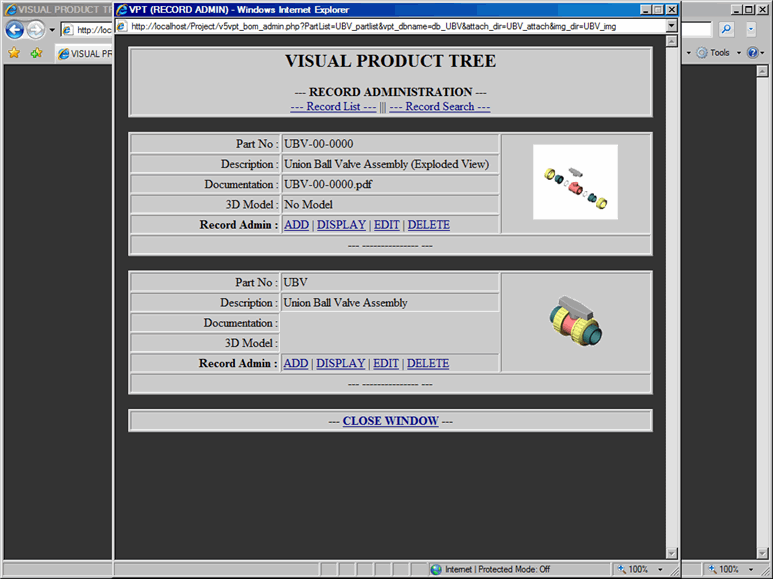
VPT - Record Administration (Parts List)
Edit
Part to Parts List:
In order to edit part to the Parts List,
proceed with the following steps:
From the Record Administration
window, click on Edit link, which will display Record Edit Form, as shown
in Figure 1.
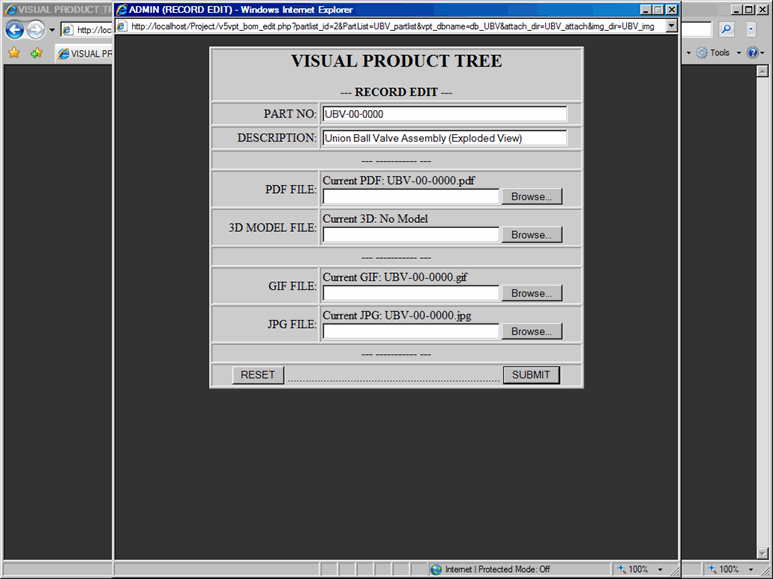
Note that in the Record Edit Form, all the current information regarding
the part has been displayed.
To change part number,
type in new part number in the Part No text box.
To change part description,
type in new description in the Part Description text box.
Provide new PDF File,
if PDF documentation has changed.
Provide new 3D Model
File, if CAD 3D Model has changed.
Provide new GIF image,
if thumbnail image has changed.
Provide new JPG image,
if main image has changed.
Submit the form to process
your request to edit part.
|

|
NOTE:
In Record Edit Form, if you enter Part No that already exists in the Parts
List, you will get an error message and process will be terminated.
NOTE:
GIF images are 100x100 pixels and JPG images are 450x375 pixels. GIF and
JPG images can be added later. However, if you do not provide images,
you will get an error message in the Form Confirmation window. |
Figure
1: Admin - Edit Form
Once the Edit Form is submitted, confirmation
window will be displayed with the following information, refer to Figure
2.
File uploaded successfully
or not (for PDF, 3D Model, GIF or JPG file)
Updated Part No and Part
Description
Updated file name of
PDF documentation, if documentation was submitted
Updated file name of
3D Model, if model was submitted
Updated thumbnail image
of part, if GIF image was submitted
Updated larger image
of part, if JPG image was submitted
Click on the Close Window link and part will
be edited to the Parts List as shown in Figure
3.
Figure
2: Admin - Edit Form Confirmation
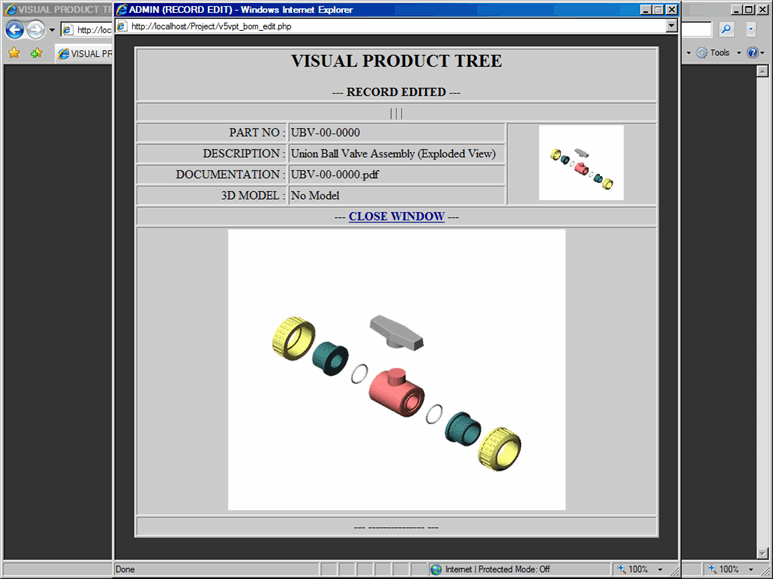
Figure
3: Admin - Part Edited into Parts List